
A concealed hood can sit within a row of matching wall cabinets or inside a larger decorative surround. Either approach affects the cabinet layout. A photo helps explain the appearance you want; the selected equipment’s documents establish what the enclosure must accommodate.
Two insert hoods to study
Use these manufacturer examples to see what needs to appear in your cabinet plan. Product images come from the manufacturers’ websites; they do not show NOVARS projects.
Broan-NuTone BBN1303SS
A built-in insert with a broad stainless underside. Look at the finished bottom of the cabinet as well as the housing and outlet above it.
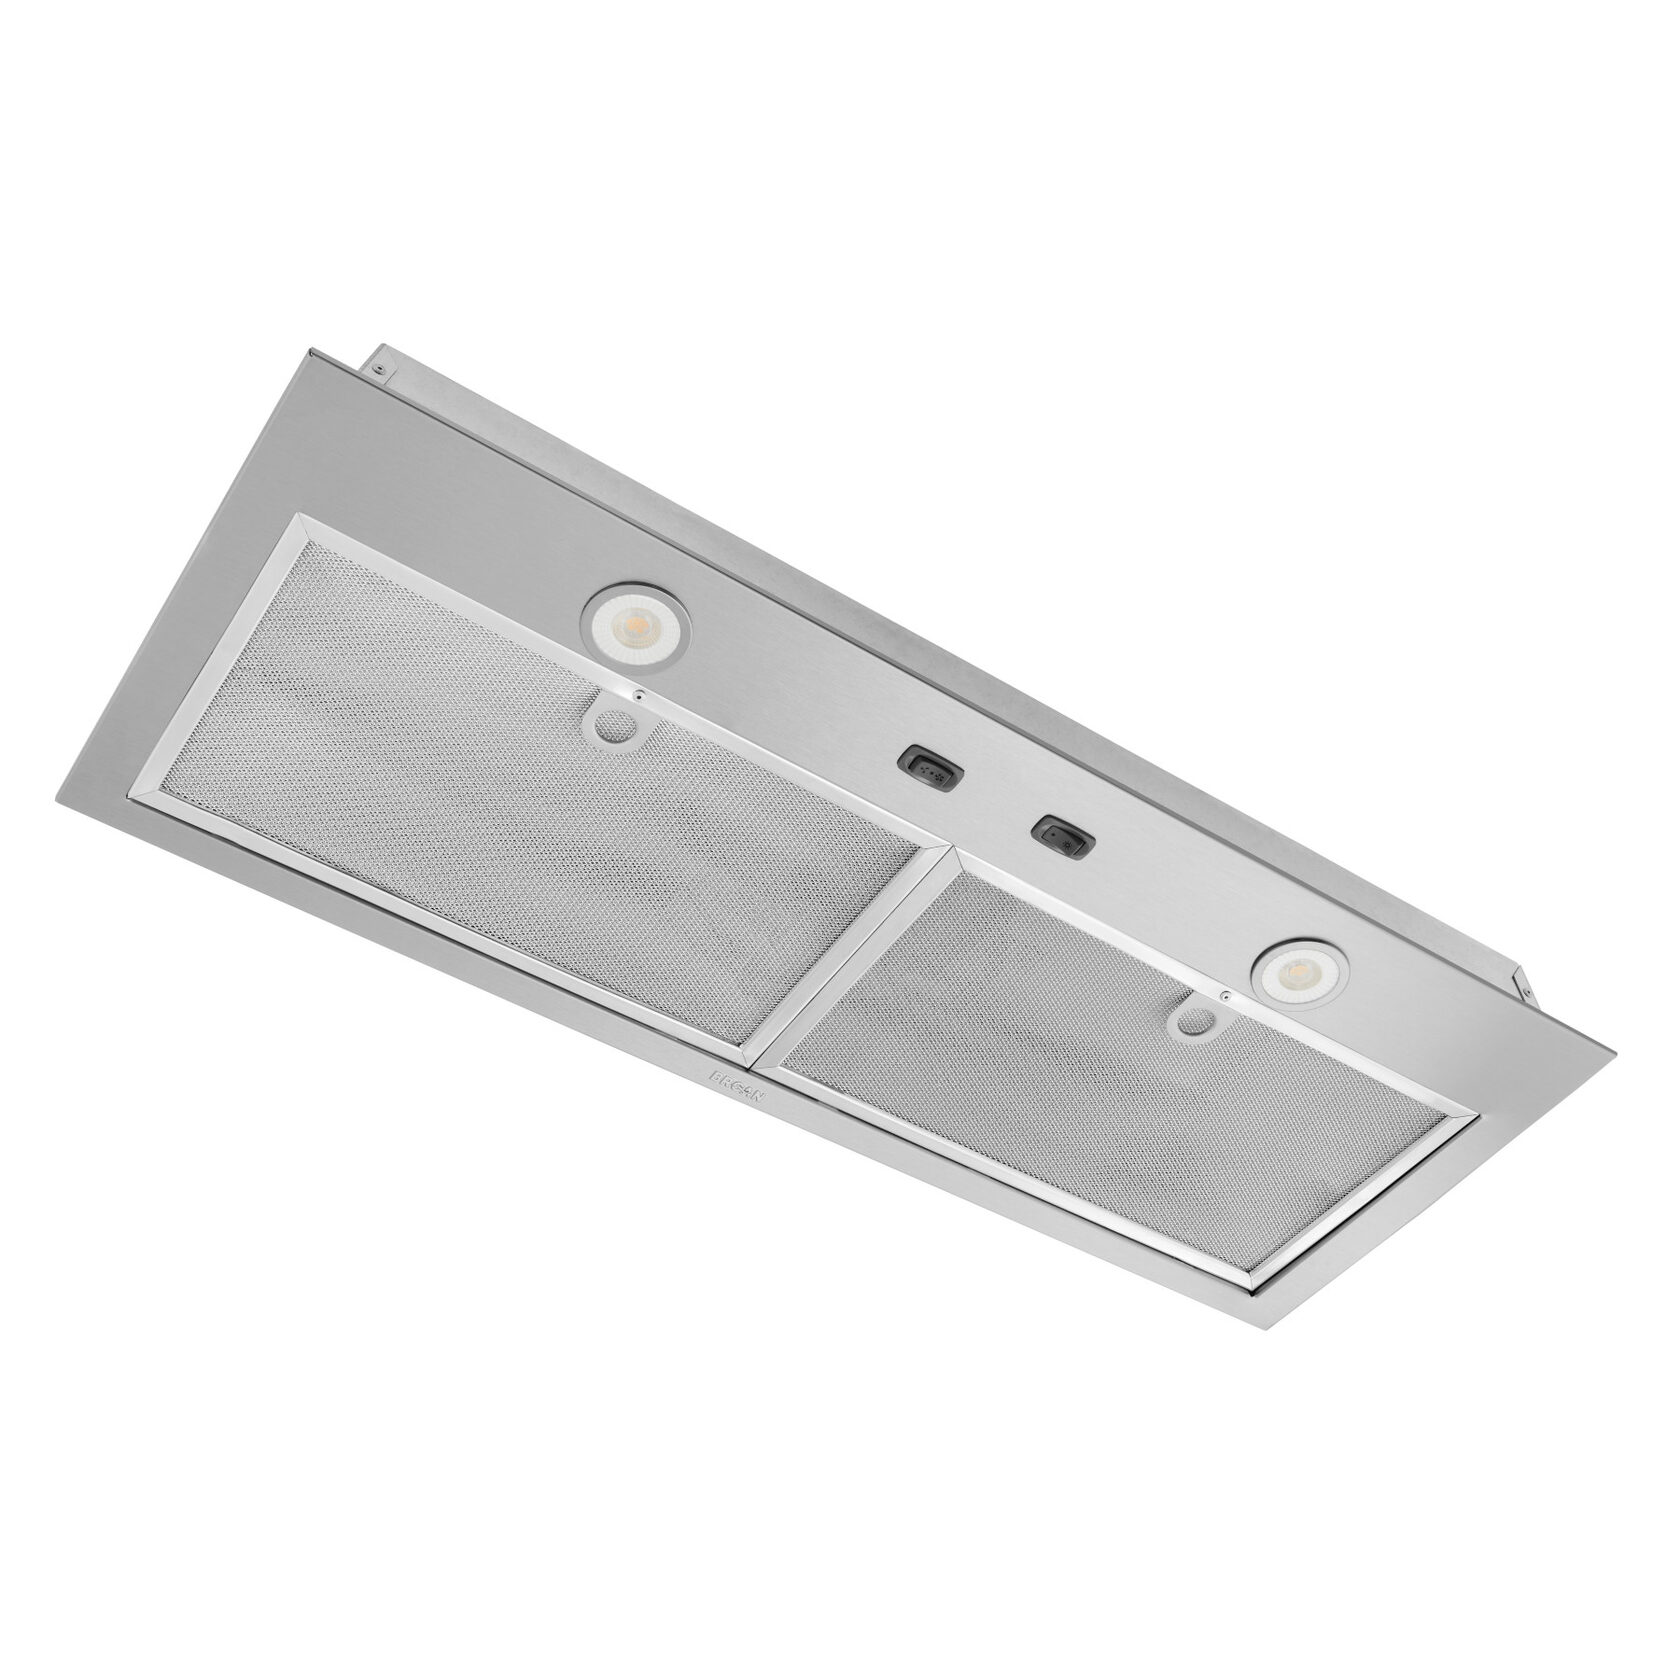
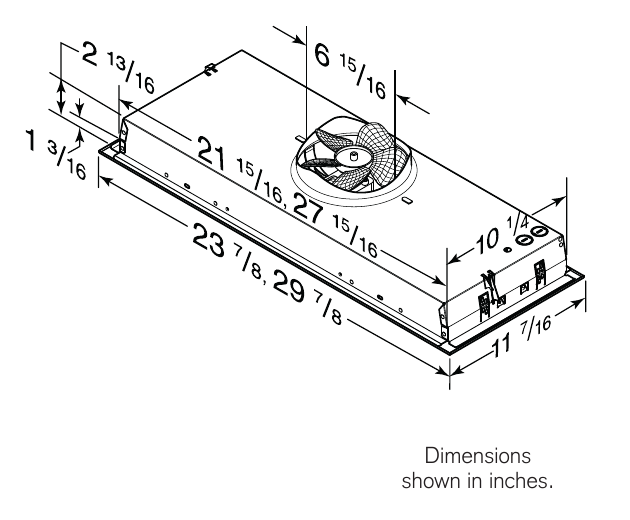
The BBN1 family drawing shows two sizes. Match the dimensions to BBN1303SS in the full specification sheet.
Elica Arezzo · EAR140S4
This insert sits inside a custom enclosure. Review the depth of the metal body, the filter access from below, and the space needed above for the duct connection.
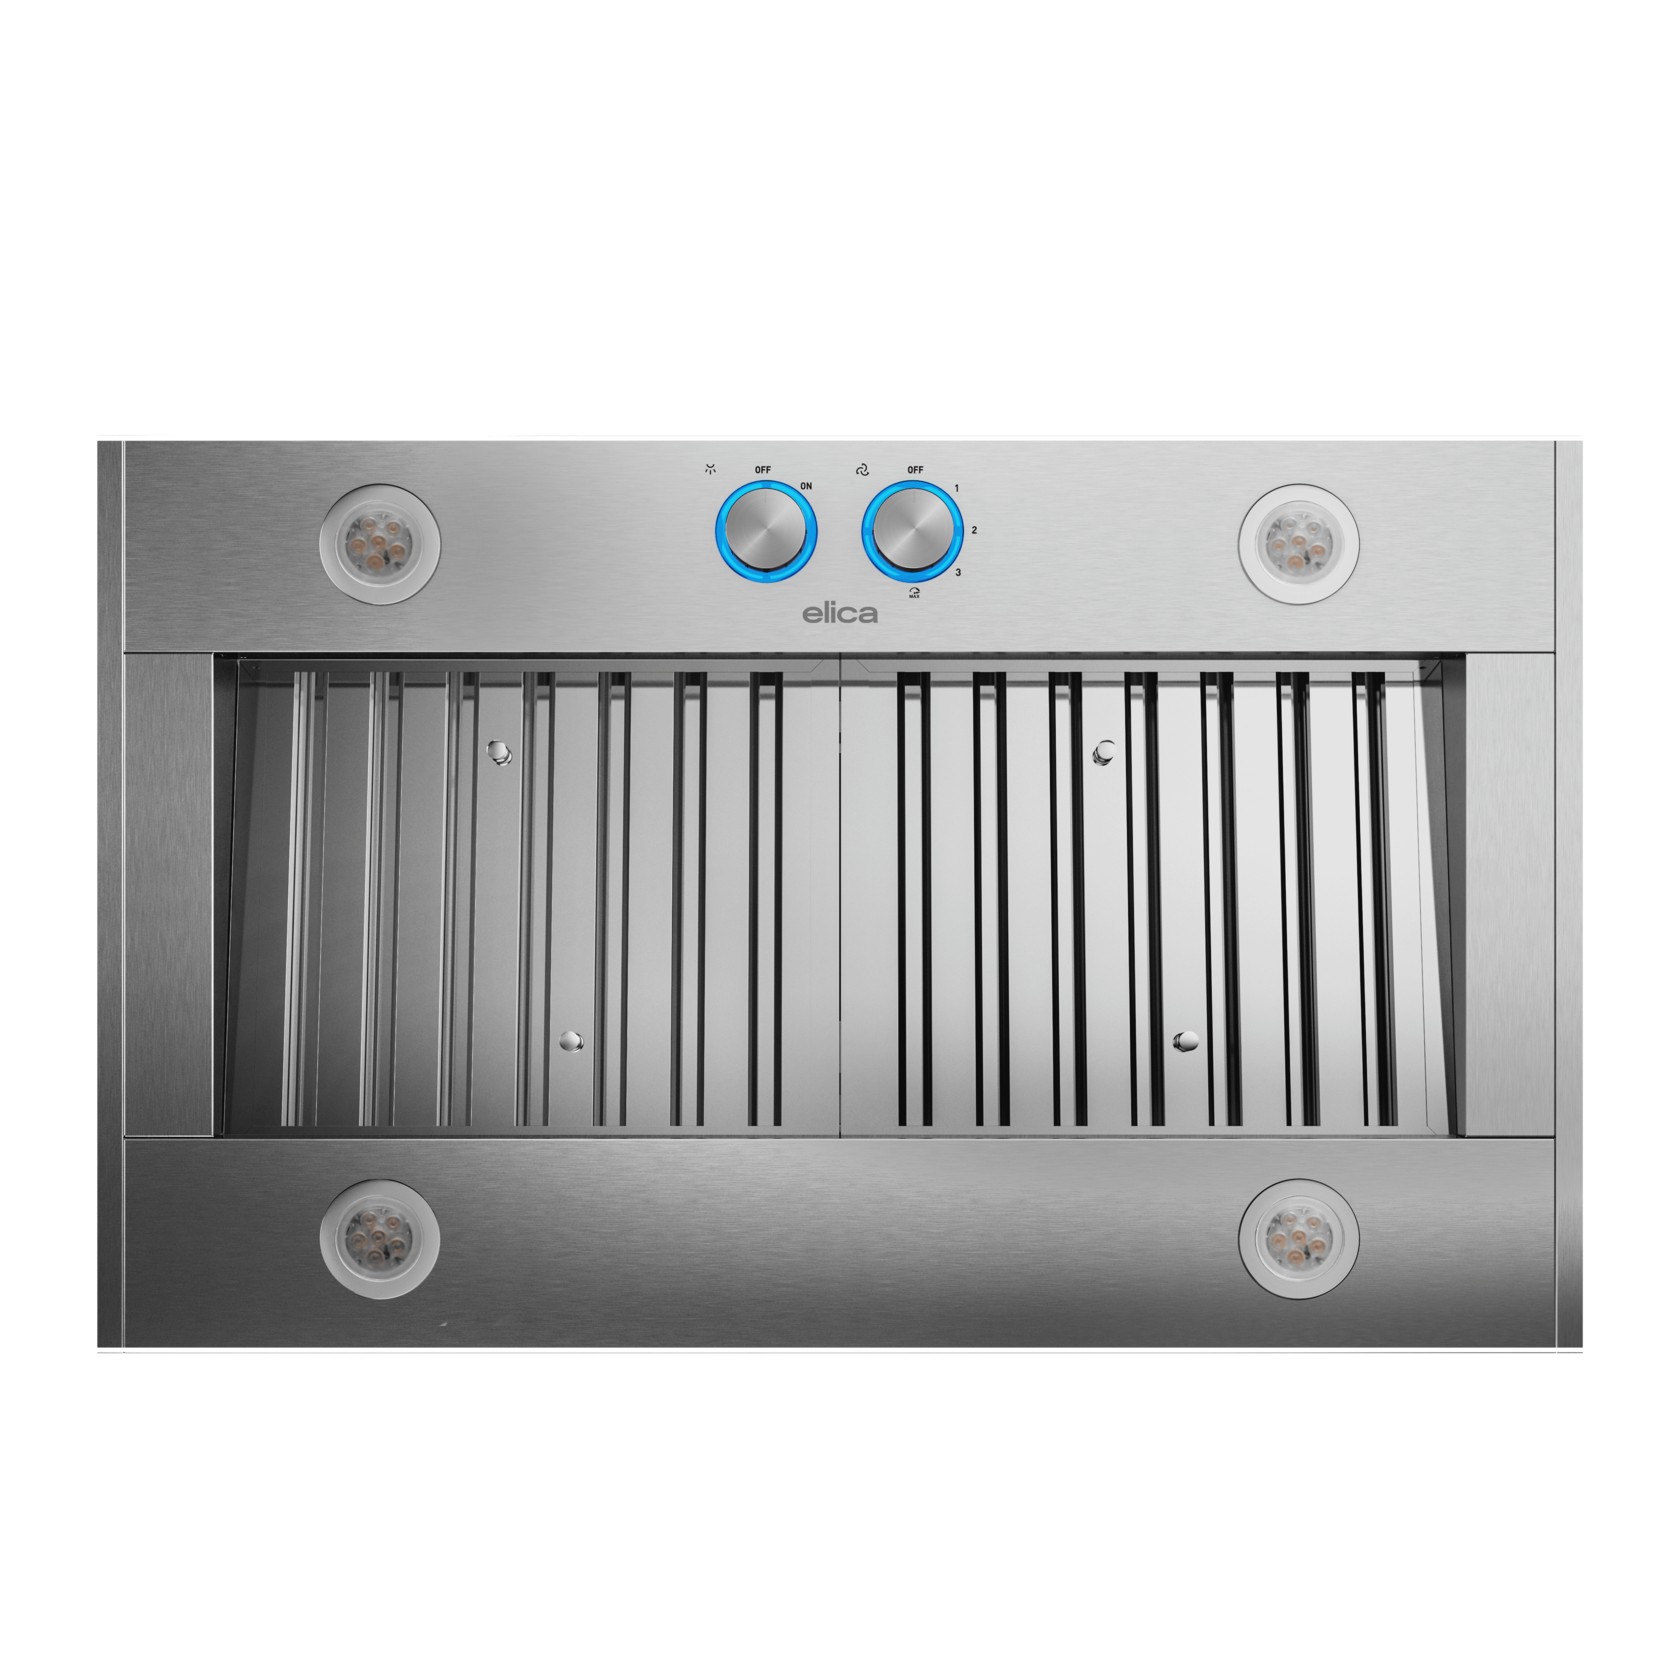
Model-specific dimensions are in the original sheet.
Open Elica’s drawing →The specification sheet covers several Arezzo models. Use the EAR140S4 column when reviewing this example.
Understand the parts you are choosing
The insert is the appliance fitted into the enclosure. The surround is the visible cabinetry or decorative cover. A liner, where specified, finishes and protects the enclosure’s underside around the insert.
These parts can have separate specifications. For example, Zephyr’s Tornado I page lists an optional adjustable-depth liner and separate documents for the insert, liner and recirculating kit. Keep the documents for your exact combination together.
Zephyr Tornado I product pageChoose the model before finalizing the cabinet
Give your cabinet designer the exact hood and cooking-appliance model numbers, their current installation manuals and any selected accessories. A product’s advertised width is not enough information to draw the opening.
Ask to see the enclosure’s outside dimensions alongside its usable internal space. This makes it easier to discuss how the chosen equipment affects the depth, lower edge and proportions of the cabinet. Hauslane’s planning guidance likewise places insert selection before the final cover design.
Hauslane: Designing a Range Hood CoverDecide where the air goes
For a ducted installation, have the ventilation installer confirm the route to the outdoors, including its transitions and termination. Record the route on the drawings before cabinet production.
Zephyr Twister / Tornado I installation guideFor recirculation, confirm that the selected hood supports it and identify the required kit and filters. Filtered air needs a designed path back into the room. Broan-NuTone describes this as air returning through the hood’s designated vents.
Broan-NuTone: What does ductless capable mean?The outlet matters when cabinets reach the ceiling. Zephyr’s ZRC-0080 instructions, for example, show separate return-air arrangements for a cabinet below the ceiling and one flush with it. The detail belongs in the design conversation before the surround is closed in.
Zephyr ZRC-0080 recirculating kit instructionsSet the height from the equipment documents
Have the installer check both the hood instructions and the cooking-appliance requirements, then mark the agreed mounting height on the elevation. Resolve any conflict before approving the cabinet.
Zephyr’s installation guide explicitly directs readers to the range manufacturer’s clearance requirements as well. A height copied from a showroom photo cannot establish compatibility for your equipment.
Zephyr Twister / Tornado I installation guideShow the support and installation sequence
A finished underside can conceal the attachment details. Ask your cabinetmaker to identify the supporting base and the surfaces used to secure the insert.
In the Zephyr liner system reviewed here, the instructions say the insert must also be secured to a wood surface. They describe an assembly sequence that changes for certain shallow installations. That is a useful reason to review the insert and accessory documents together.
Zephyr AK08xxxS liner instructionsBefore approving a drawing, ask the cabinetmaker to walk through how the equipment enters the enclosure and when each panel is installed. Keep any unresolved attachment detail marked for review.
Check access from the room
Ask the installer to demonstrate how the filters will come out and how the controls will be reached in the proposed design. Have the electrician confirm the connection location before the cabinet is made.
Then ask what has to be removed if the appliance needs service. Record the answer on the drawing, especially where a fixed decorative panel conceals equipment.
Bring these decisions to the drawing review
Use the worksheet below with your designer, cabinetmaker and installers. Assign a person to each open question and attach the relevant document or marked drawing. Treat a checked box as a record of that discussion; it does not replace the manufacturer’s installation instructions.
| Decision | What to confirm |
|---|---|
| Equipment | Exact hood, range or cooktop, and accessory model numbers recorded. |
| Documents | Current manuals and accessory instructions attached to the drawing set. |
| Ventilation | Outdoor exhaust route or permitted recirculation arrangement confirmed by the installer. |
| Room conditions | Installer has reviewed applicable ventilation, electrical and building requirements, including whether makeup air needs to be addressed. |
| Cabinet fit | Internal dimensions, cutout and enclosure depth coordinated with the equipment. |
| Height | Mounting height checked against both appliance documents and marked on the elevation. |
| Support | Cabinetmaker has identified support, attachment surfaces and assembly sequence. |
| Everyday access | Controls can be reached and filters can be removed as intended. |
| Service | Access for connections and future equipment service has been discussed. |
| Appearance | Exterior proportions reviewed after the equipment and ventilation arrangement were coordinated. |
Use the checklist above during your cabinet design review.
Questions that come up during planning
Can a recirculating hood be completely enclosed?
Its required air intake and return-air outlets must remain available. Ask the installer to show the entire recirculation path on the cabinet drawing, using the instructions for the selected hood and kit.Broan-NuTone: What does ductless capable mean? · Zephyr ZRC-0080 recirculating kit instructions
Does every custom hood need the same liner?
Check the selected insert’s requirements and compatible accessories. The liner in the Zephyr example is a specific optional accessory; its dimensions and attachment details are not a template for other products.Zephyr Tornado I product page · Zephyr AK08xxxS liner instructions
Can I design the surround first and choose the insert later?
You can explore the appearance early. Before releasing the cabinet for production, confirm an exact equipment combination and resolve its fit, ventilation and access requirements.Hauslane: Designing a Range Hood Cover
Bring the hood into the cabinet design
NOVARS offers remote kitchen and cabinetry design for homeowners across the U.S., including drawings for your own contractor or cabinetmaker. If you haven't chosen a cabinetmaker yet, NOVARS can also help with cabinetry fabrication and installation in New York and New Jersey. Bring your selected appliance information and room measurements into the design process.
Explore NOVARS design services →
Back to the Journal