
A real set, not a portfolio shot.
A sample drawing set, sheet by sheet
Twelve sheets from NOVARS projects: a kitchen plan, dimensioned elevations, appliance coordination, cabinet sections and finish notes. Nothing is hidden behind a form — read it, zoom in, and judge whether it is the way your shop likes to receive drawings.
Part one — how a project is set up
Sheets 1–6 are the presentation part of the set: how work starts, what a coordinated elevation communicates, and how appliances are checked against the cabinetry.
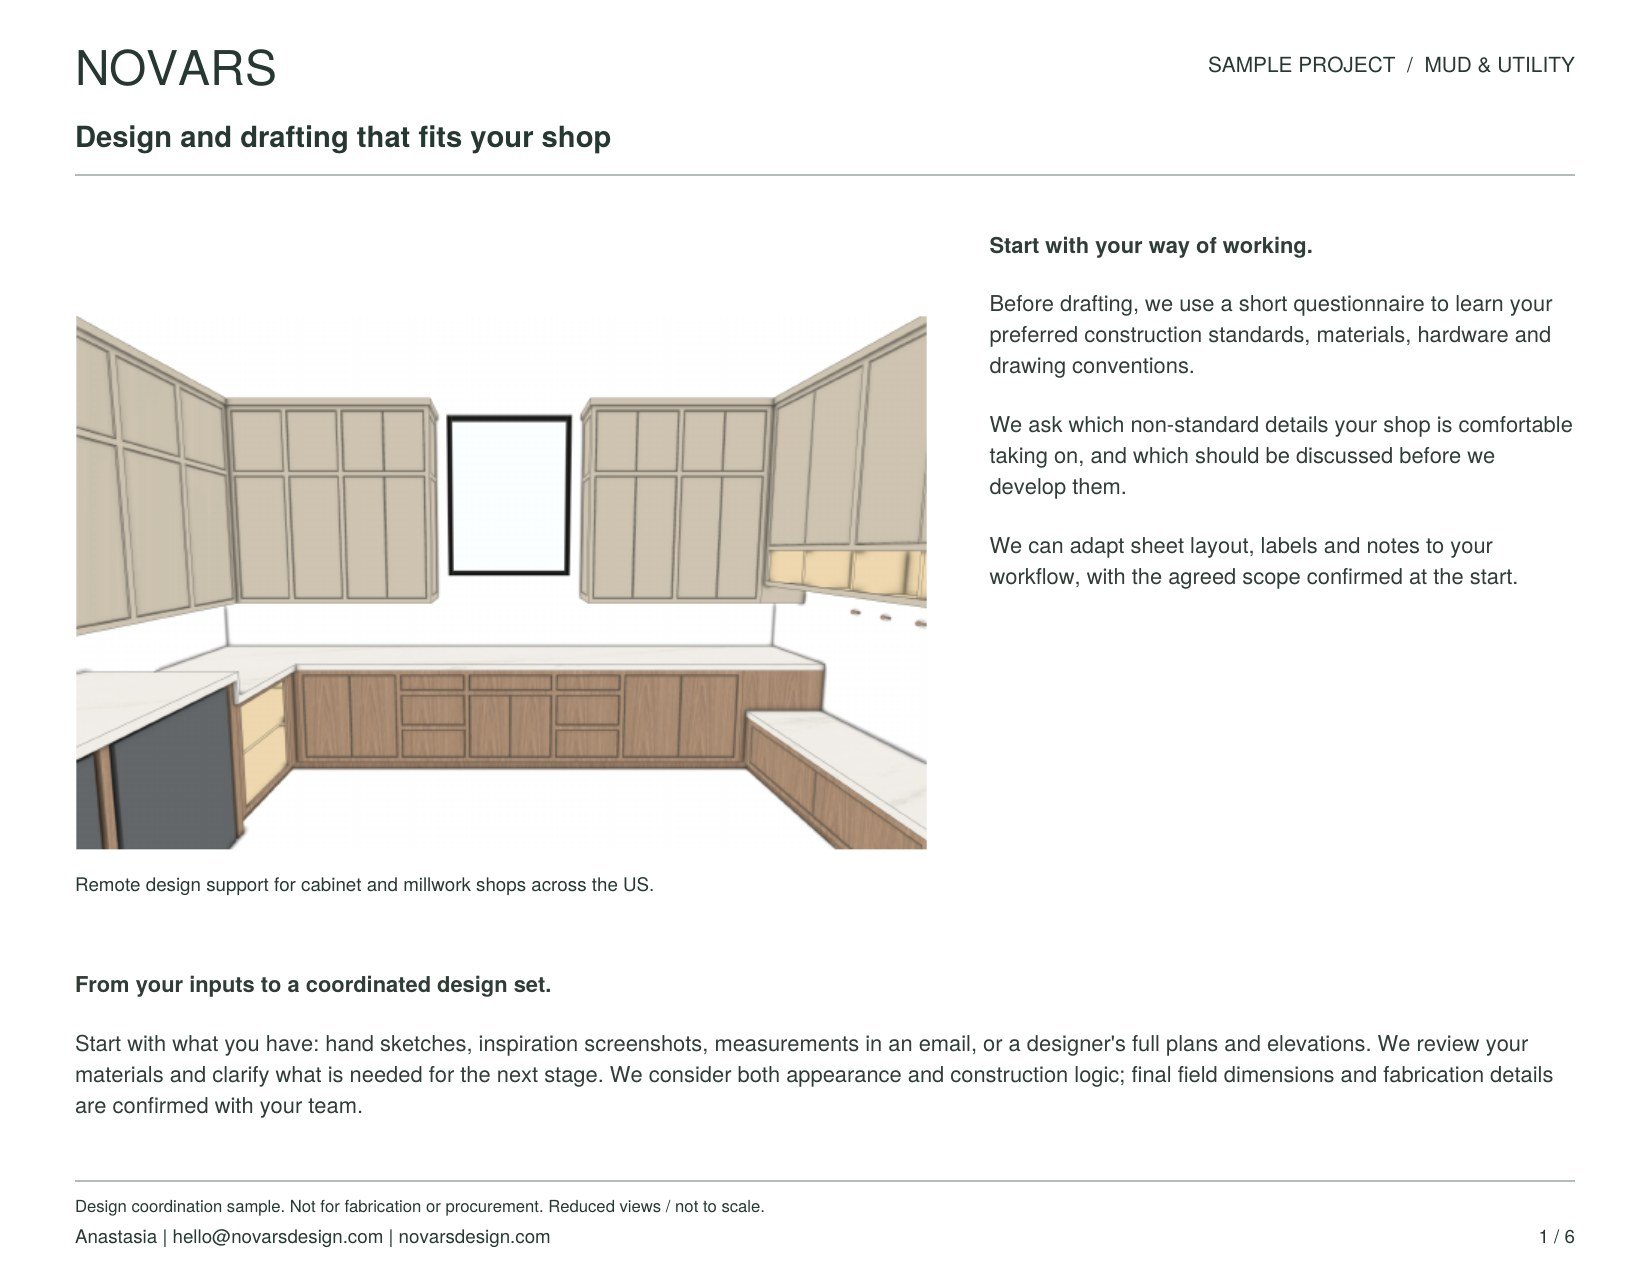
Sample project: Mud & Utility
How a NOVARS project starts: a short questionnaire on your construction standards, materials, hardware and drawing conventions, and which non-standard details your shop is comfortable taking on.
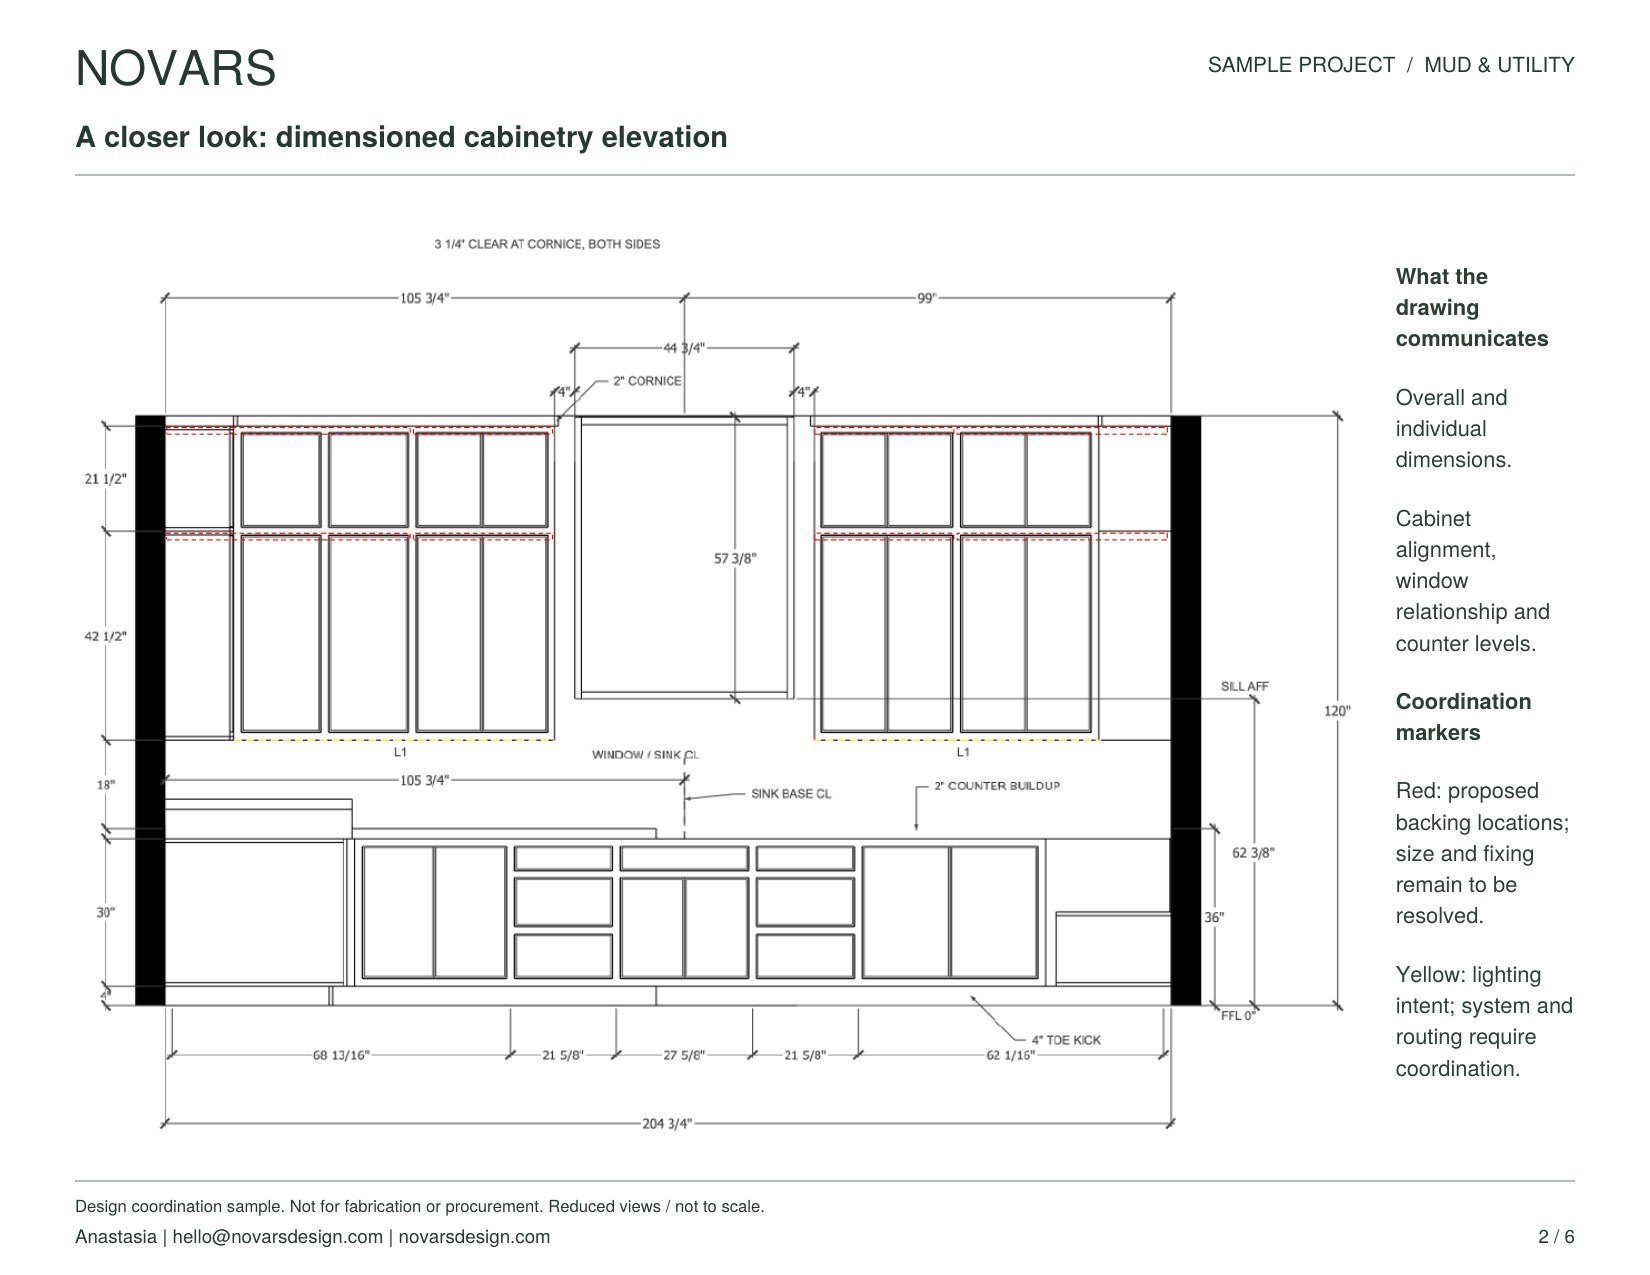
Dimensioned cabinetry elevation
Overall and individual dimensions, cabinet alignment, window relationship and counter levels. Coordination markers separate what is proposed from what is confirmed.
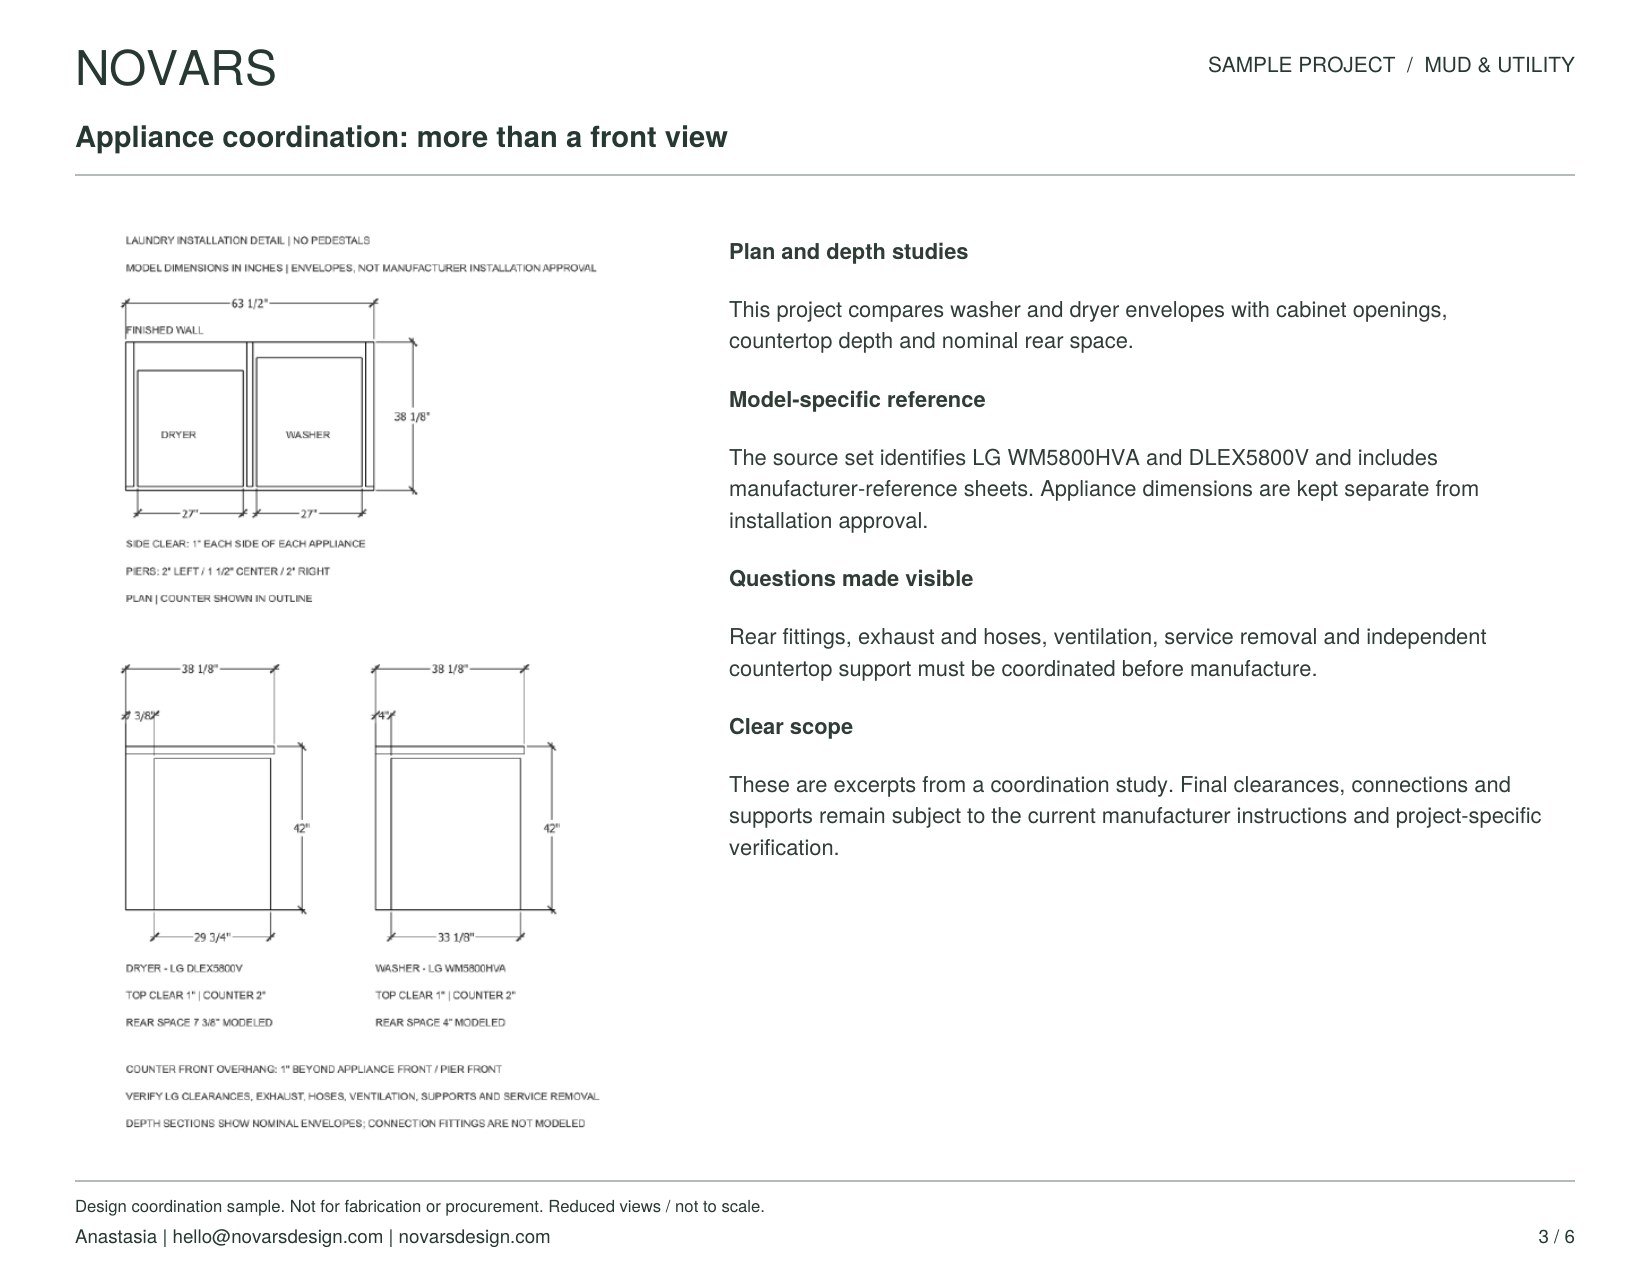
Appliance coordination: more than a front view
Washer and dryer envelopes compared with cabinet openings, countertop depth and rear space. Rear fittings, exhaust, ventilation and service removal are raised before manufacture.
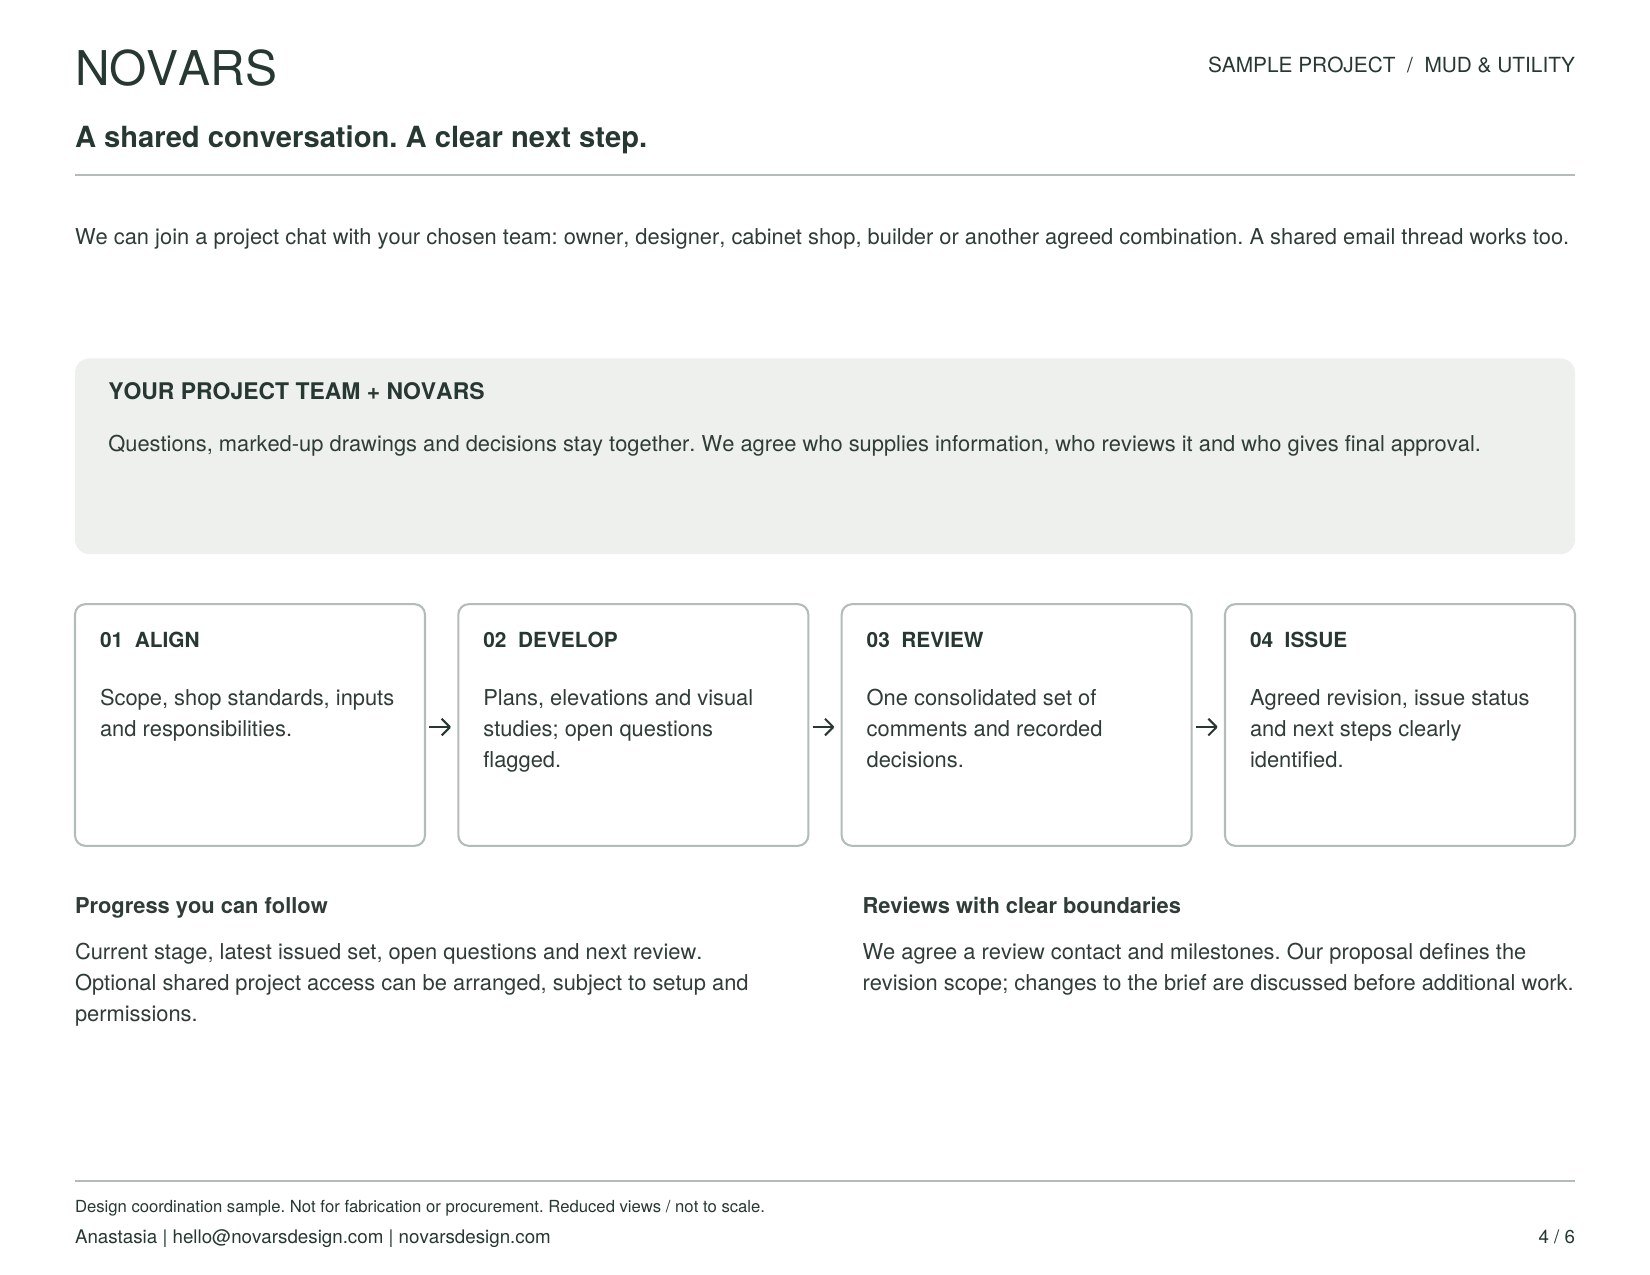
A shared conversation, a clear next step
Owner, designer, shop and builder in one chat or thread. Align, develop, review, issue — with responsibilities and approval agreed at the start.
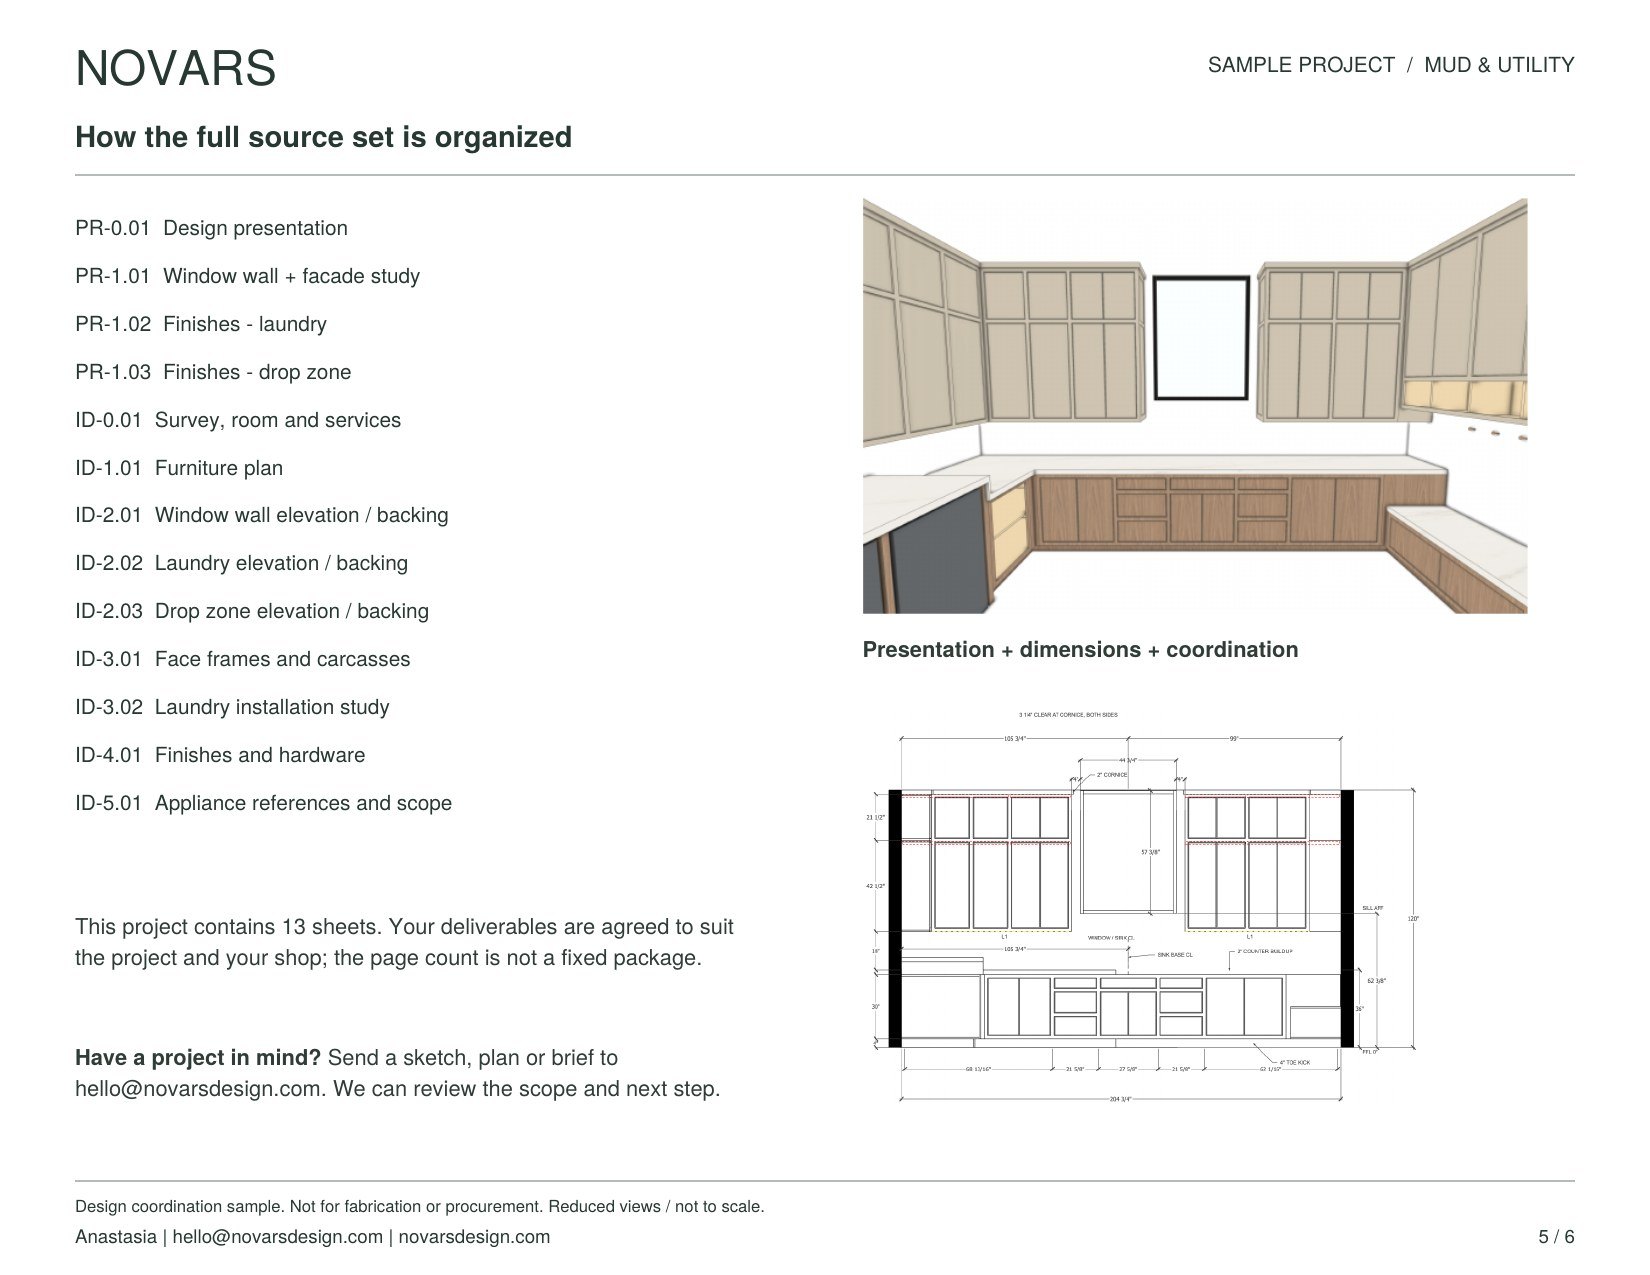
How the full source set is organized
Presentation, survey, furniture plan, elevations with backing, face frames and carcasses — thirteen sheets with a consistent numbering scheme.
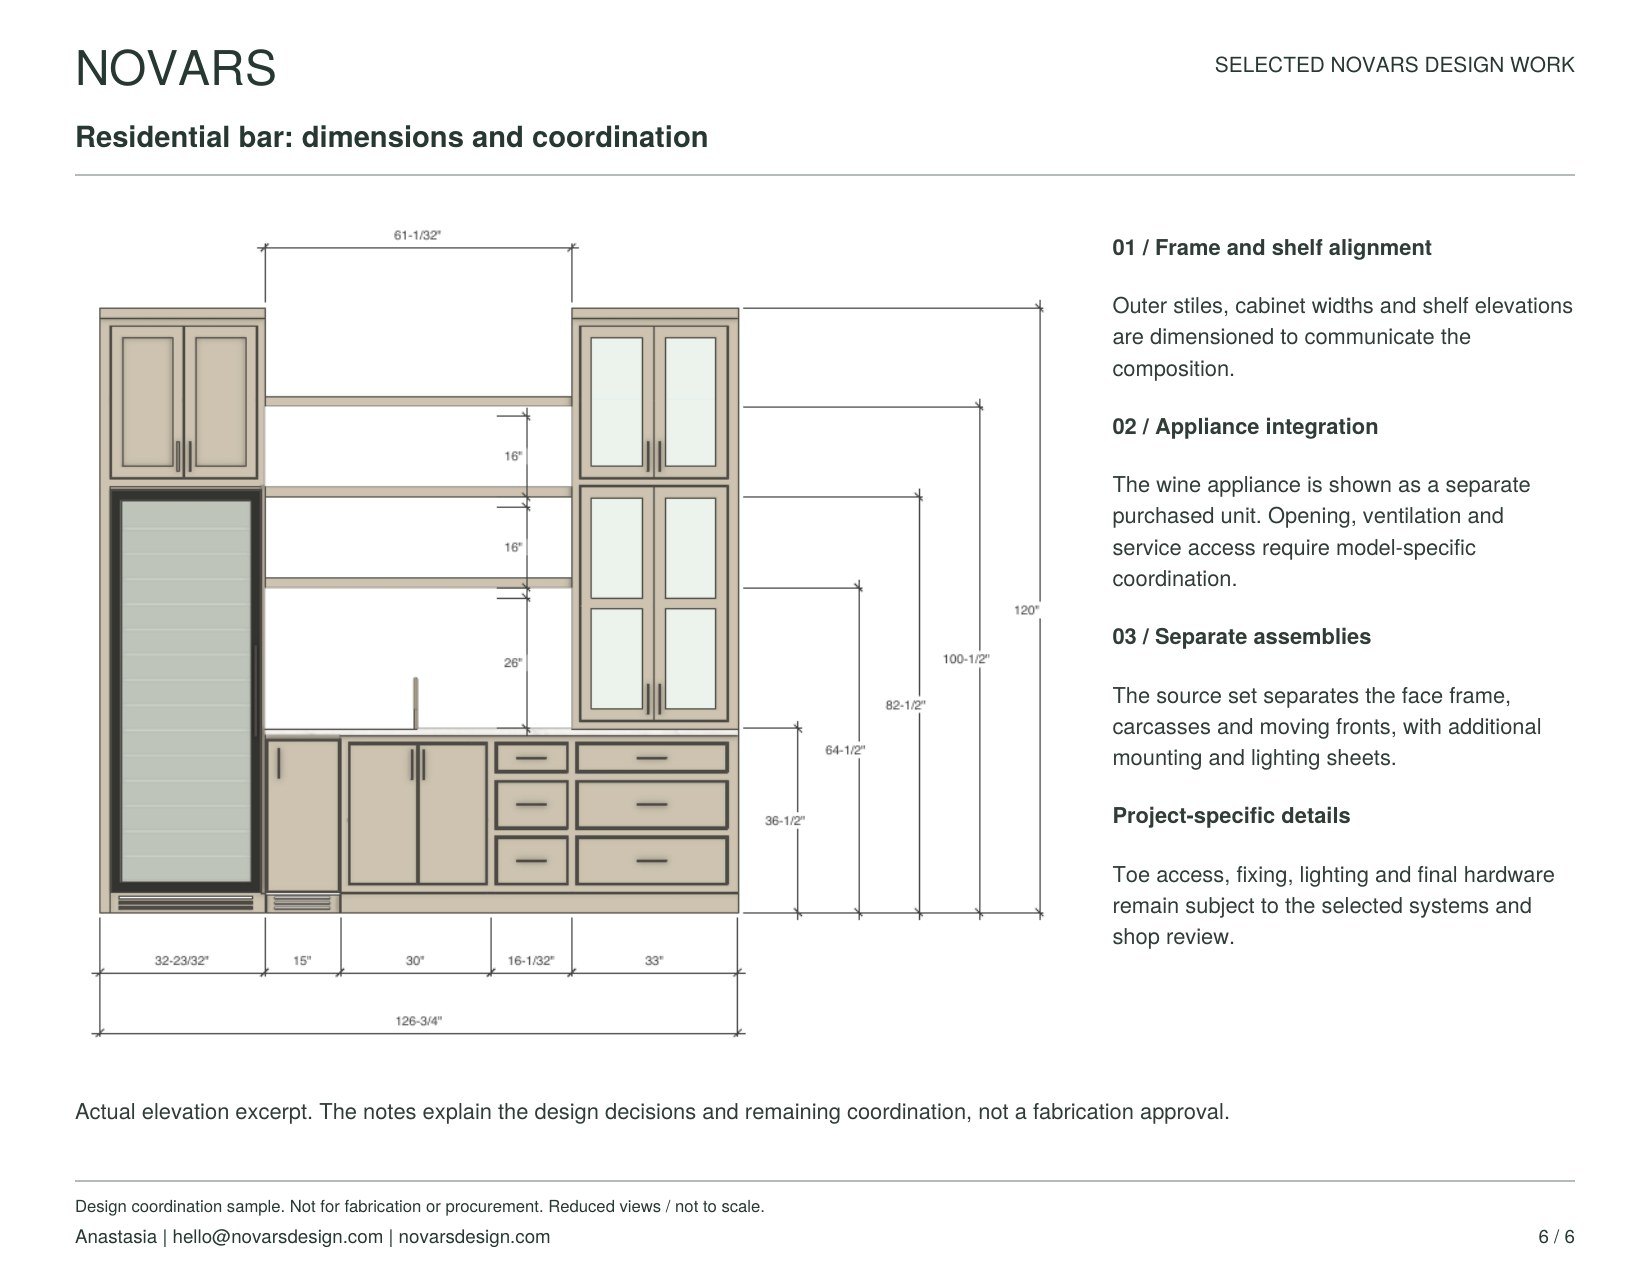
Residential bar: dimensions and coordination
Outer stiles, cabinet widths and shelf elevations dimensioned as a composition. The wine appliance is shown as a separate purchased unit needing model-specific coordination.
Part two — the working sheets
Sheets 7–12 are the drawings a shop actually builds from: plan, elevations, sections, appliance schedule and panel options. Every number that still needs confirmation is marked, not assumed.
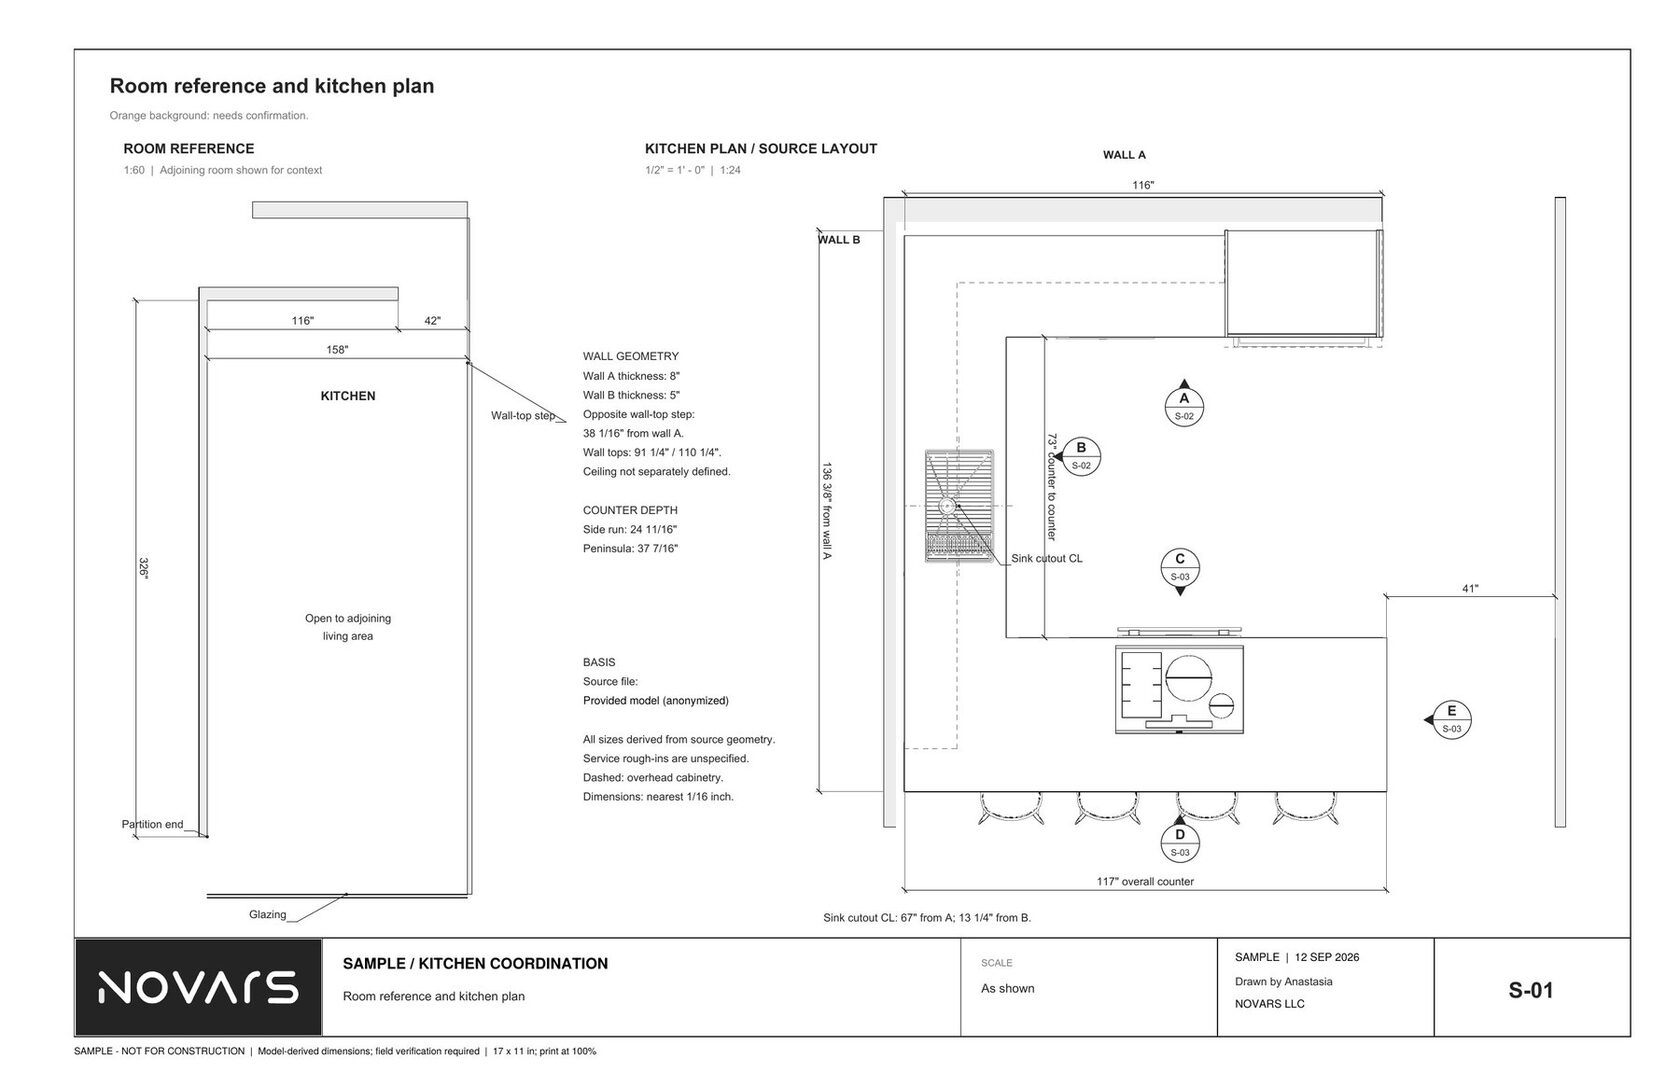
Room reference and kitchen plan
Adjoining room shown for context, wall geometry called out, and the wall-top step dimensioned. Anything on an orange background still needs confirmation.
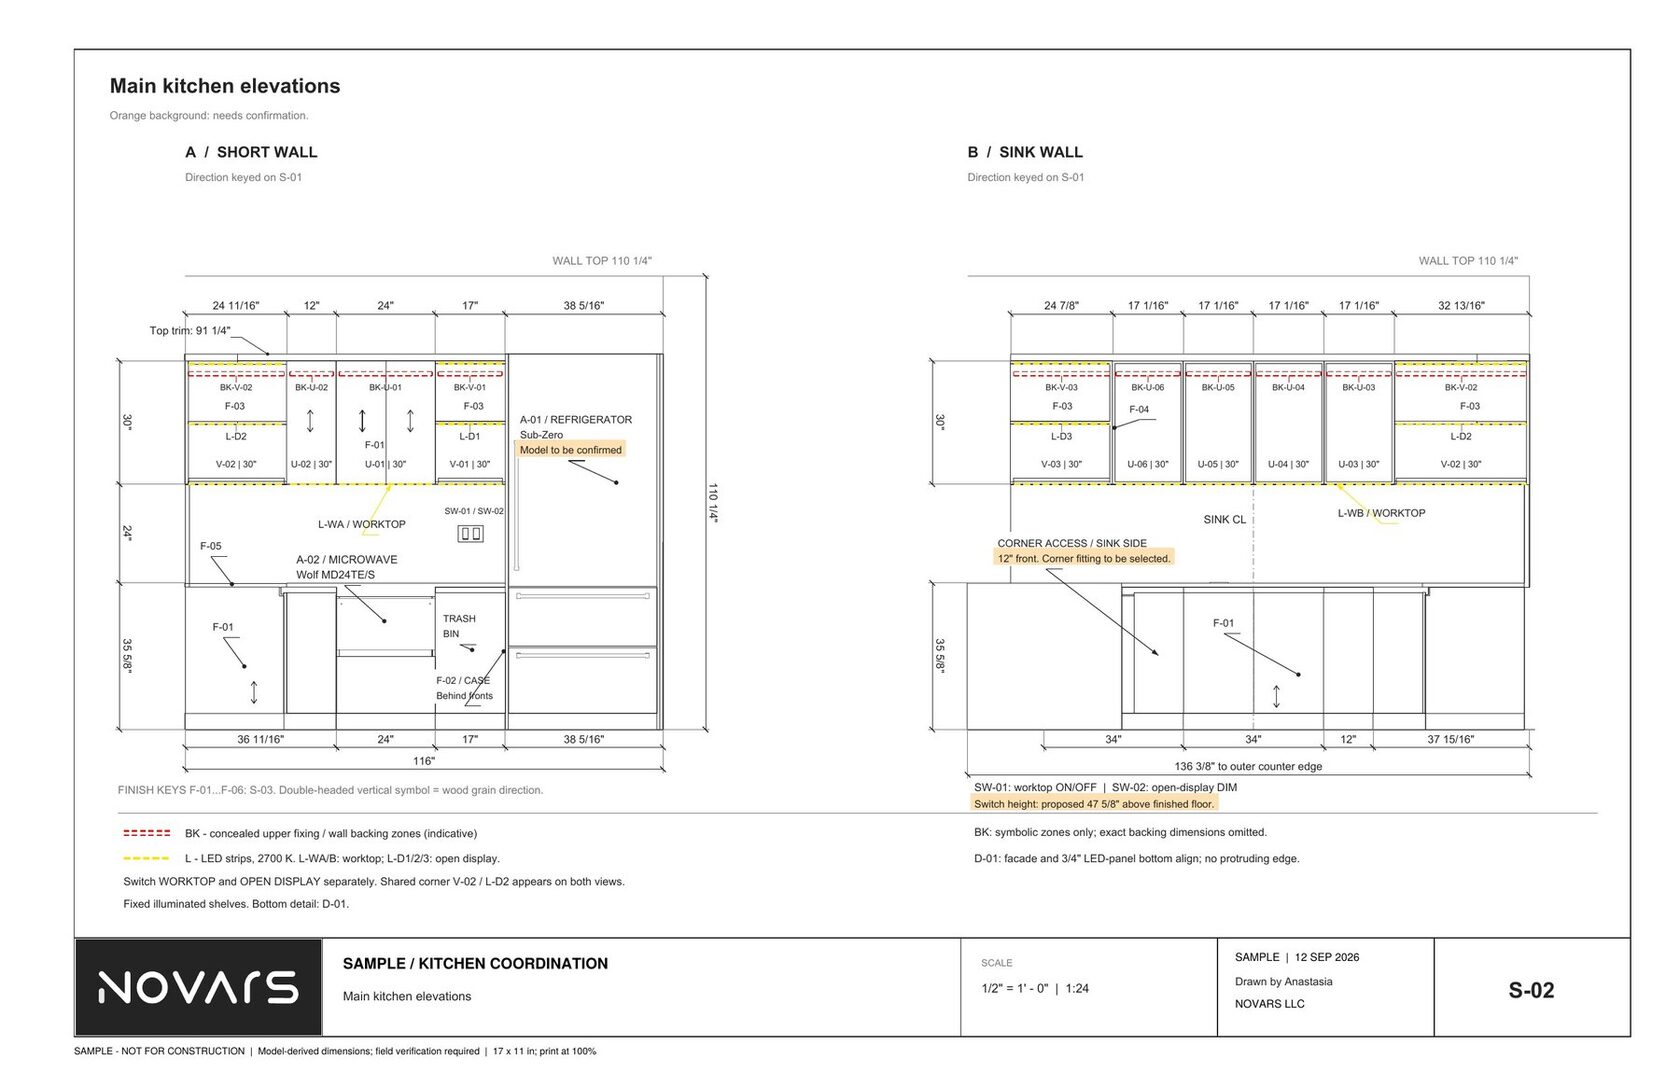
Main kitchen elevations
Short wall and sink wall, keyed back to the plan. Cabinet tags, finish codes, trim heights and wall-top datum on one sheet.
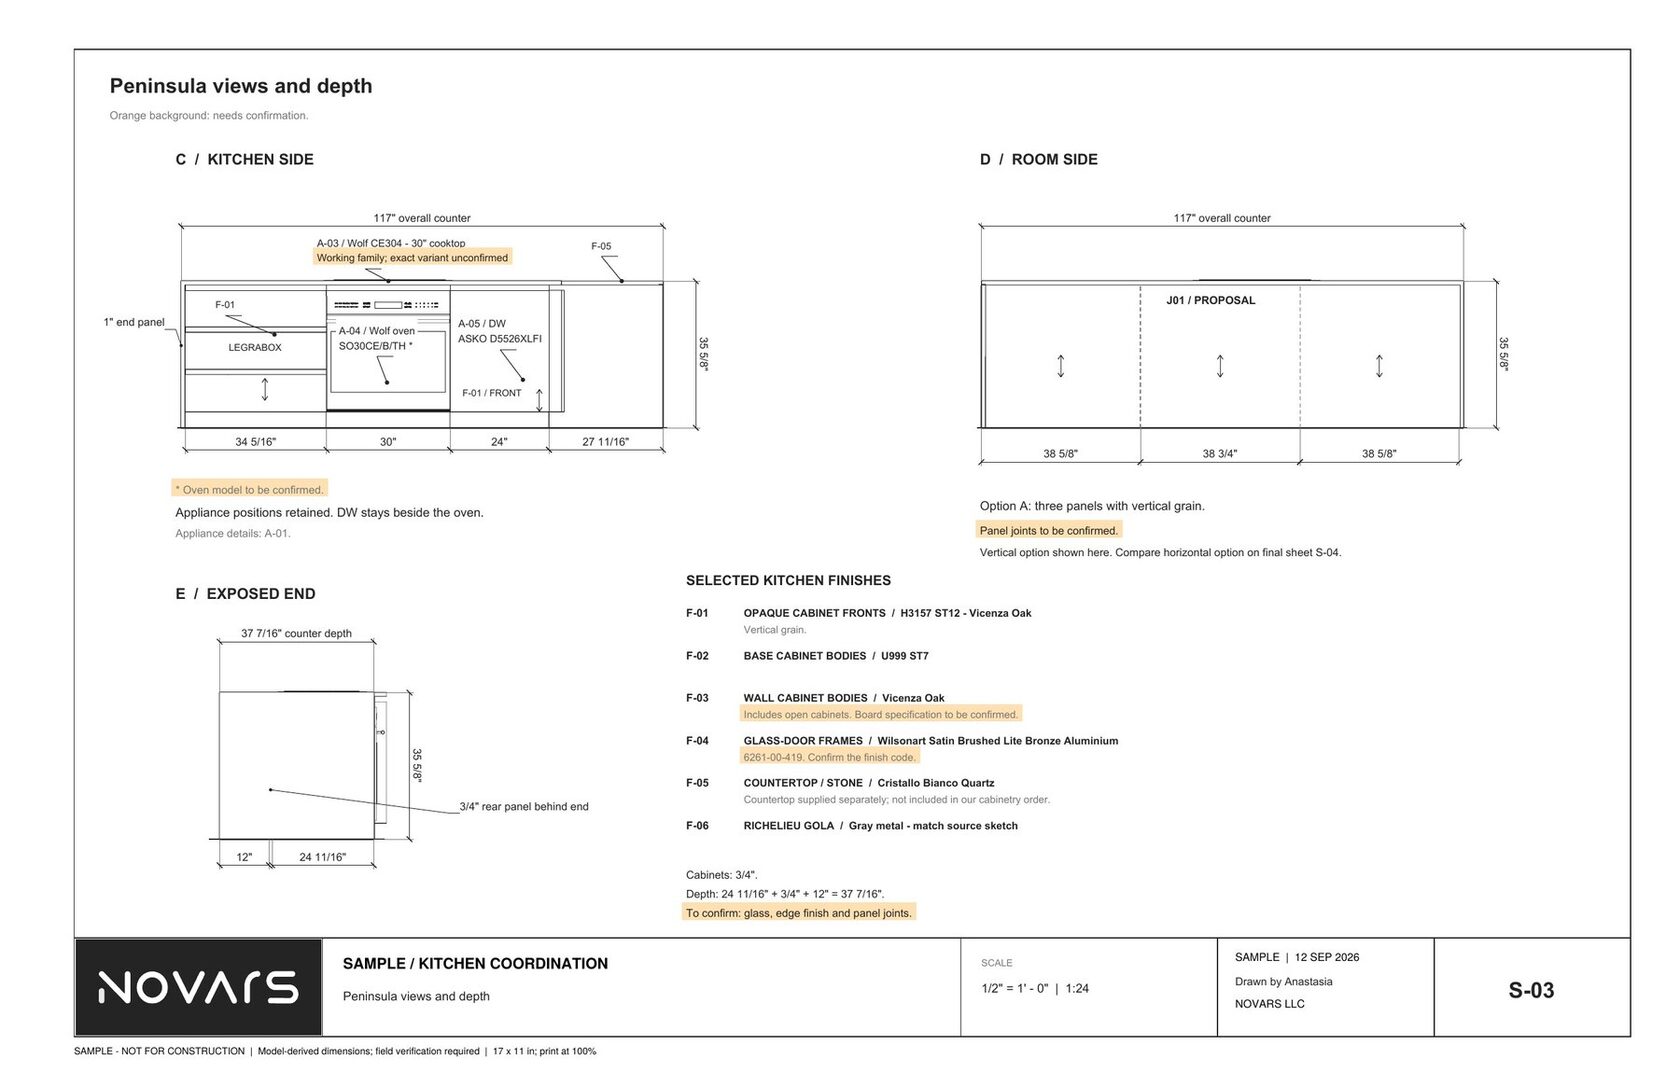
Peninsula views and depth
Kitchen side and room side of the peninsula, with overall counter length, appliance positions and end panel thickness.
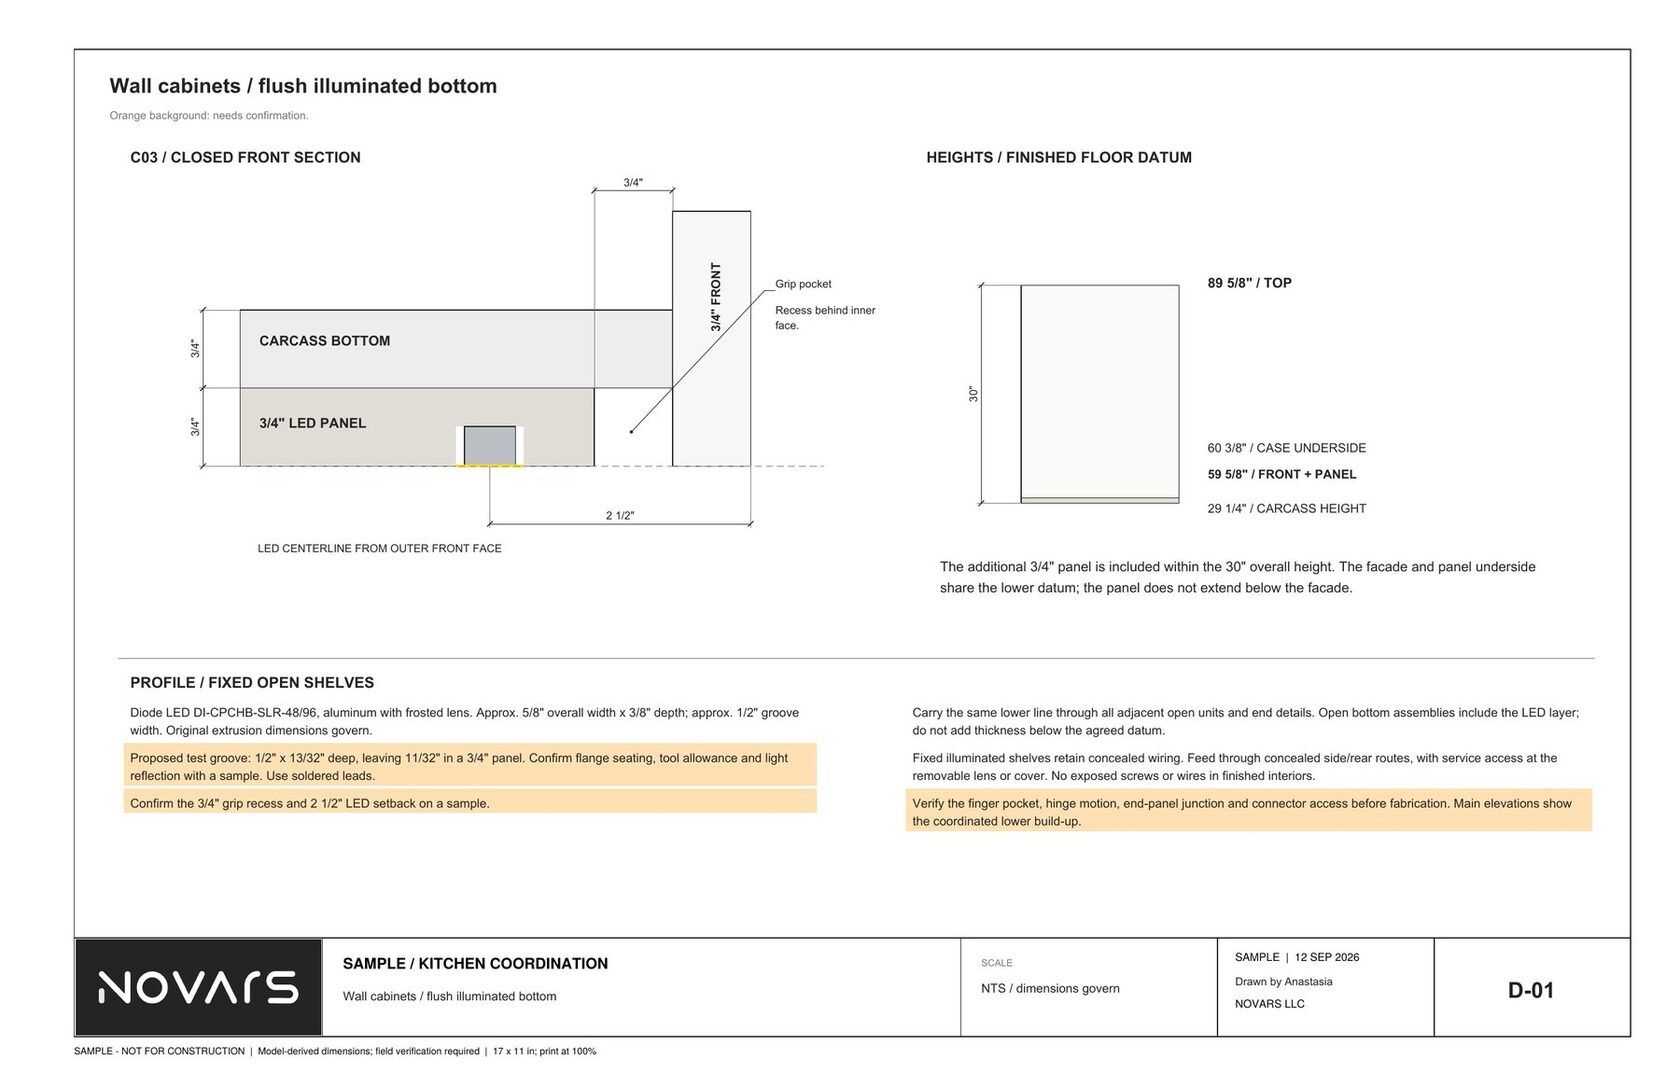
Wall cabinets and the illuminated bottom
A closed front section through the carcass: front thickness, grip pocket recess and heights taken from the finished floor datum.
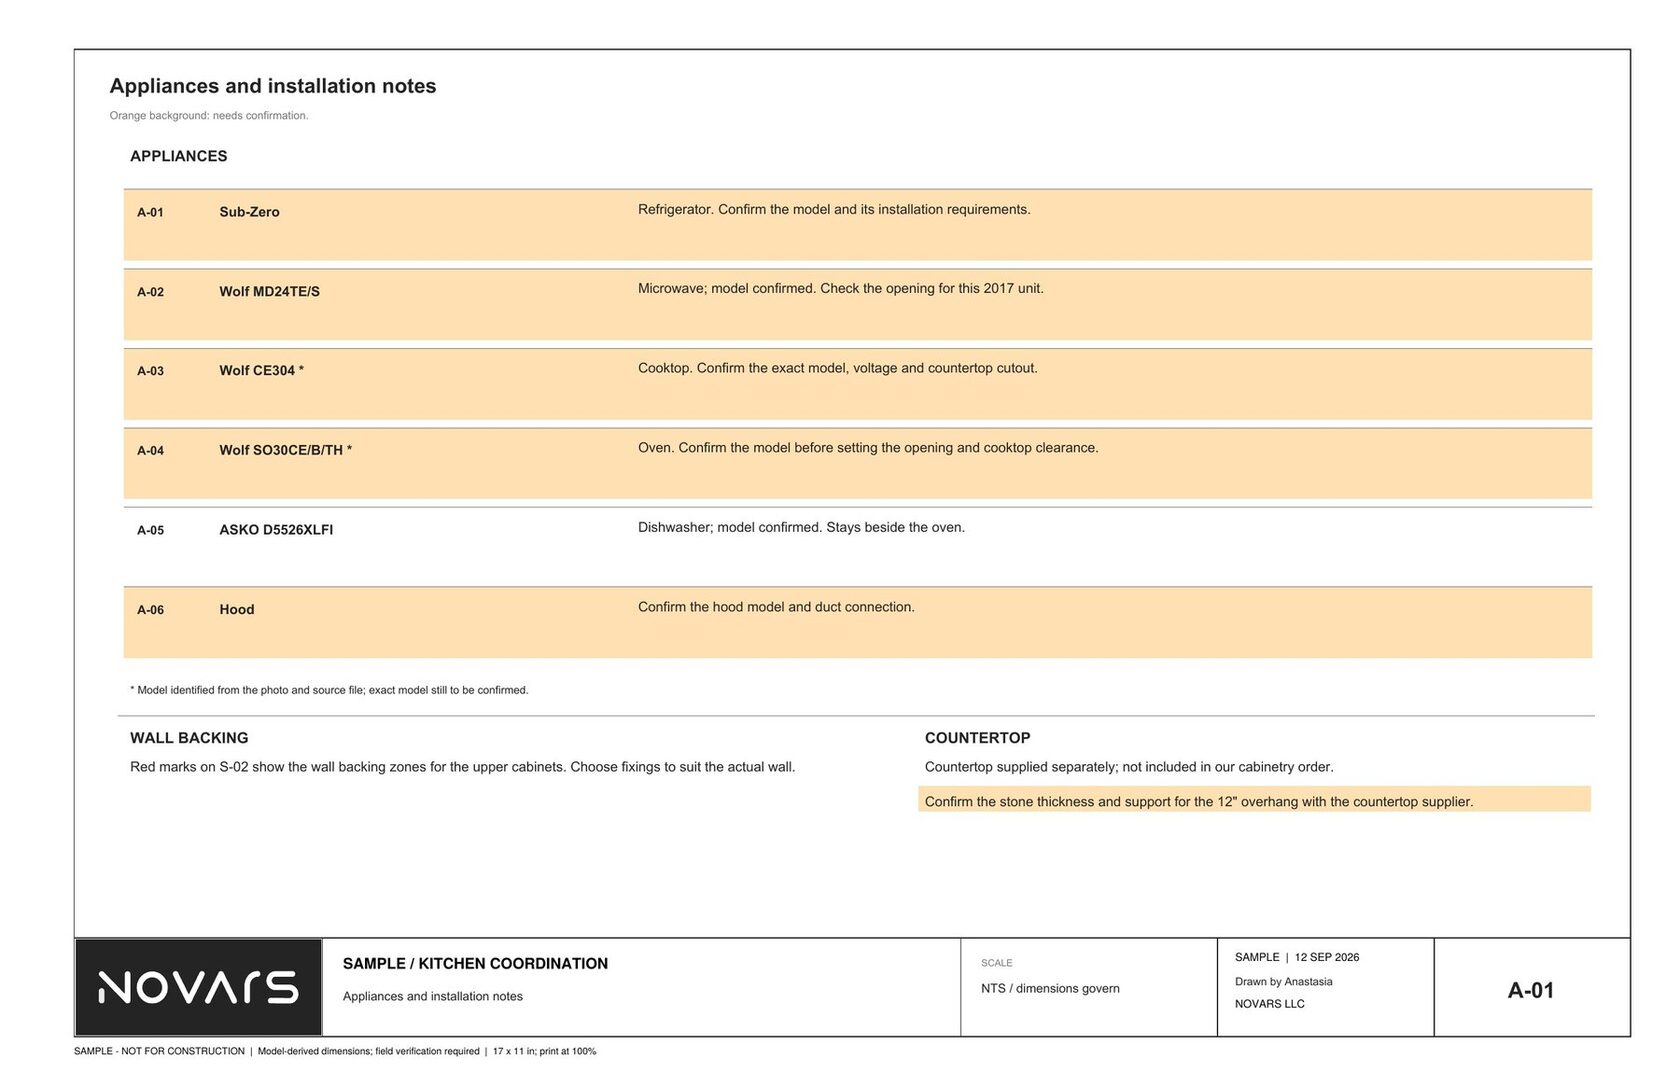
Appliances and installation notes
Every appliance listed with its tag, model and what must still be confirmed: voltage, cutouts, openings and clearances.
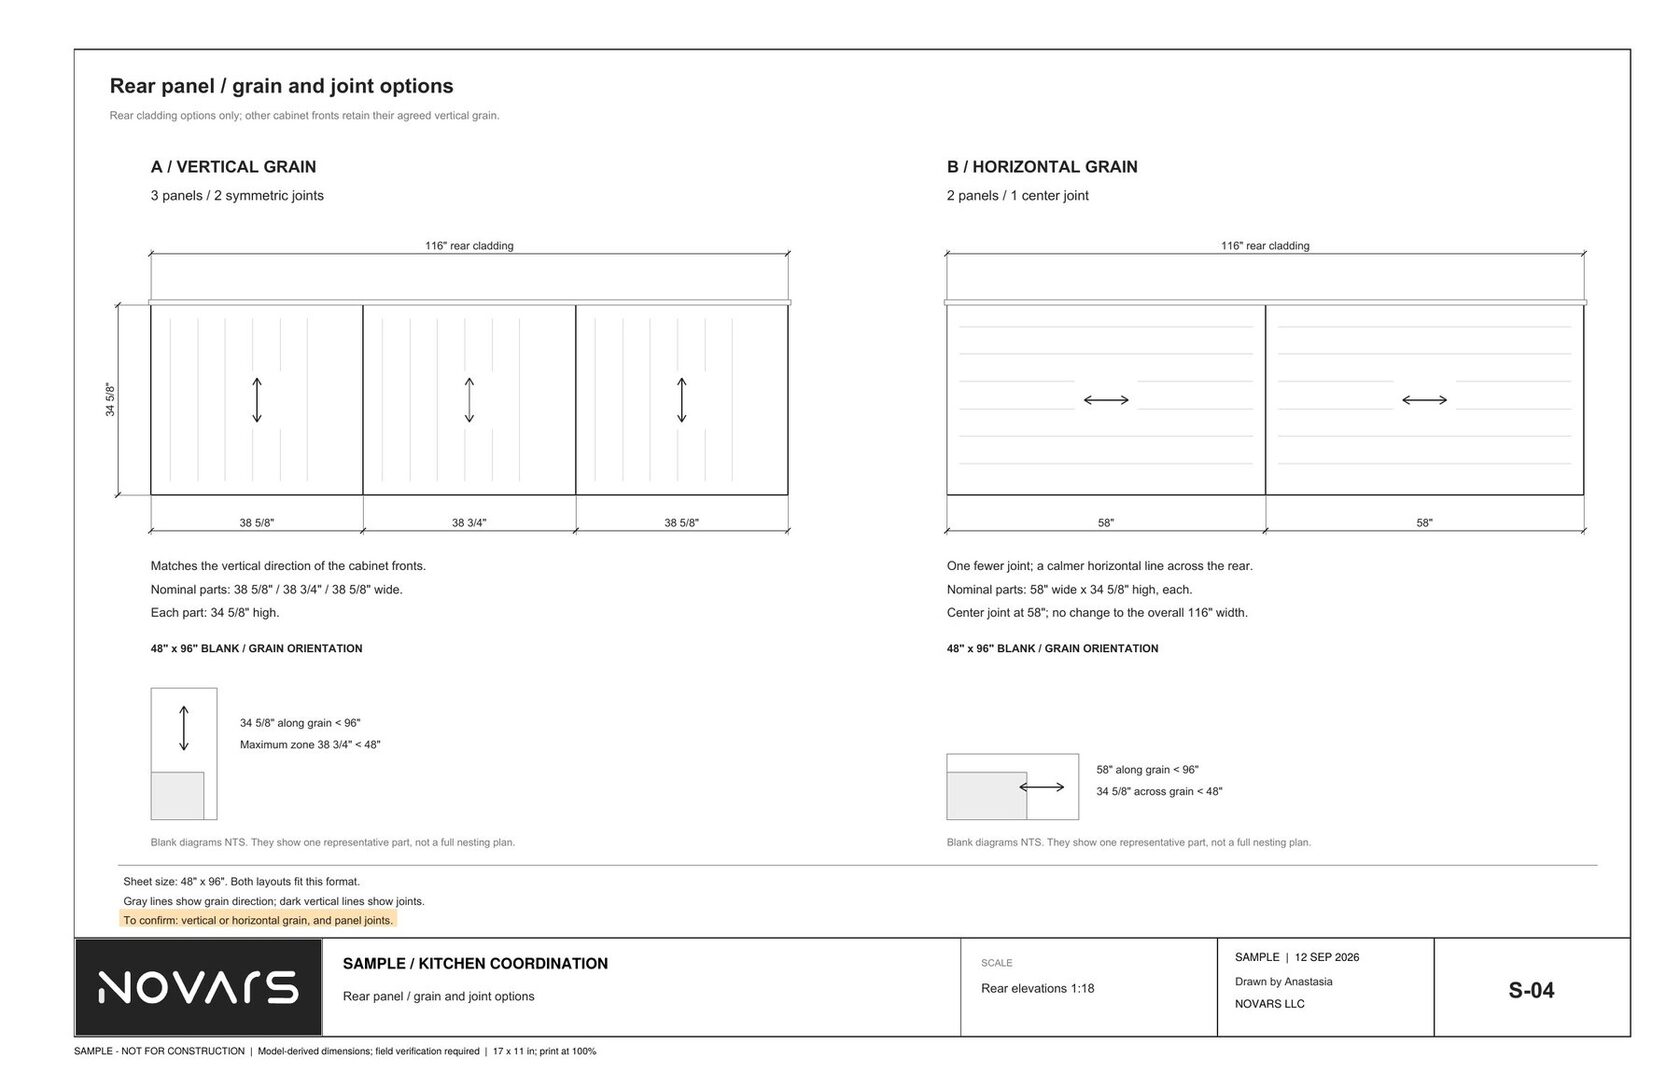
Rear panel: grain and joint options
Two cladding options compared on one sheet — vertical grain with two symmetric joints, or horizontal grain with a single centre joint — with nominal part sizes for each.
Click any sheet to open it full size.
What you would get
Files
PDF for the floor, plus SketchUp, AutoCAD or Mozaik sources on request. Sheet layout, labels and notes follow your shop’s conventions, agreed at the start.
Turnaround
3–5 business days for a coordinated set of this size, once the intake questionnaire is answered and measurements are in.
Open questions
Anything unconfirmed — appliance models, clearances, services, structural support — is marked on the drawing and listed, so it is resolved before cutting, not after.
White label
Work can be issued under your shop’s name with no contact with your client. NDA on request.